Wednesday, February 23, 2011
Head band.....
These head bands will go so well with the OUTFIT I bought myself a while back. I guess that in the picture it does not match too well but it's just about the exact same shade of purple as the tank top and some of the flowers in the skirt. I found the tutorial HERE for these.So easy it only took me about 10 min total for both of them. I do still have to sow the band though.
Tuesday, February 22, 2011
The old baby room pictures....
These are the old pictures I had in the baby's room. I painted them on the deck of our Vesper house just a week before Conner was born now my little peanut is 4!!! Ughh where does the time go. I will be getting rid of these though I am a little sad to see them go :(
Monday, February 21, 2011
2 of 3.....
I finished the monkey.....all I have left is the elephant now!!! Luckily I was able to somehow mix and MATCH my colors hopefully I can do it again for the 3rd picture. The green border on the monkey picture is a little lighter but not enough to really notice unless you look really close!!!
Friday, February 4, 2011
Another flowere tutorial....
I also made these little flowers. You can really use any kind of material for these it does not need to be silk since you do not have to melt it down.
First you need to cut your strip of material. I wanted my flower to be small so it was about 5 inches long and 1 inch wide. This was silk so I melted the edges carefully so that the material would not fray.Next fold the material in half and do a loose stitch along the edge.
Then simply pull on the thread till your flower begins to take shape and sow into place.
Then for the center I used a button and a scrapbooking embellishment.
Since the back looks kinda icky like this I just cut out a little circle patch melted the edges and then glued it to the center back part of the flower to cover up the stitching.
The I sowed it to a ribbon with a partial rubber band on it with a couple other smaller flowers.
Jar....
I had a candle jar that I needed to find a use for. I never ever throw away candle jars...do you????
Since I have been on a flower power kick the jar made the perfect storage container for my new flower hair accessories. I did finally get the lid to the jar pained too....I picked a plain boring red and just sprayed it with a clear coat. It seems like our whole house is decorated in browns and reds I need a new color pallet.
This will look so cute in our bathroom.
I also made this head band...I love how this one turned out.
This little flower I just attached to a hair pin but I love it....it's so sweet.
Some white roses.
Another one I love!!!
Ok so I like em all. These would also make cute little flowers to attach to sweaters and shirts and even shoes.
Thursday, February 3, 2011
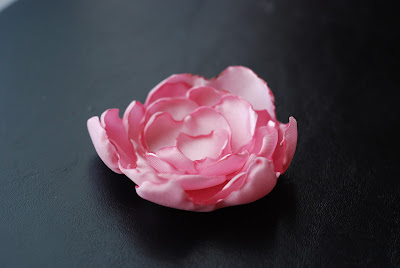
Silk Flowers....
I found this silk pillow case at the good will store for .99 cents today. Start out by drawing out different size circles on the material then cut them out.
You want the biggest on the outside and smallest on the inside.
If you want more texture then cut them into flower shape which I did for some of mine.
Then use a tea light or candle to melt the edges. No need to put it directly into the flame it will melt better and make prettier shapes if you just hold real close to the flame.
Layer your flower and using a needle and thread sow all the layers together.
I found these hair clips at wall mart on clearance ages ago I think there was 6 of them in a pack for .49 cents. Cut out a small triangle out of the silk material and make sure that you slightly melt the edges with the tea light otherwise the material will fray and it will not work. Using a hot glue gun glue the triangle to the flower with the hair clip in the middle. You can also sow it on to the bottom flower petal before you assemble the flower but gluing was just easier for me.
The back of the flower!!!
The back of the flower!!!
I also glued a little pearl in the middle but you can be creative and use a button or more material.
I also made this head band. I have had the band forever and never wear it but I'm pretty sure I will more often now.
The back of it.
How adorable is that!!!
Subscribe to:
Comments (Atom)


